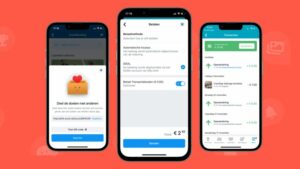
How nice that you are going to use Tasks. In this guide, we will explain the settings and preparation you can do as an administrator and the features the tasks module offers to community members.
Activating Tasks: we start in community management
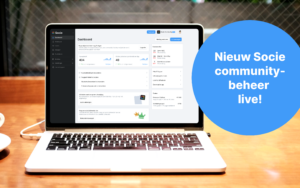
Let’s start by activating the tasks module. Log in to the community management dashboard and click on modules → Add module [the module is part of the Socie Plus package].
Tip: Want to try out Tasks yourself first or test them with a (smaller) group? Then go to Module settings in the tasks module and under ‘access’ choose the group you want to test with.
Only this group can then see the task module in the App.
Step 1: Set up who can create and manage Tasks in your community.
All tasks are created through the Socie App. Within Tasks in community management, you can Set who is allowed to create and manage tasks within your community. To do this, go to Settings -> Module management and look for the tasks module. Via edit you can change the setting ” create tasks” change to:
- Everyone
- Groups (then choose the group(s) allowed to create tasks)
- Community Administrators
Step 2: Add interests and requirements.
In addition to creating and managing tasks, the individuals you just selected can also have requirements and interests add.
[Note: Removing interests and requirements can only be done by community managers! ]
Interests and requirements vary greatly from community to community and can therefore be self-entered.
- A interest is something the community member finds interesting or enjoyable.
- A required is a qualification or characteristic of the community member.
Example 1 : When creating the Task to work a bar shift, the interest “hospitality” is specified. As a requirement, “18+” is specified.
Example 2 : When creating the Task to man a first aid station at an event, the requirement is specified as “first aid diploma”.
Example 3 : When creating the Task to hoe a garden, “Working in the garden” is specified as the interest.
Example 4: When creating the Task “Taking Mrs. de vries to the Bingo”, the interest “Driver” is specified. “Driver’s license” is specified as the requirement.
You can now exit the dashboard and continue in the app on your mobile.
It may be advisable to add some interests and requirements to the app beforehand. To do this, go to the app -> Menu -> My tasks -> Task Manager. Here you can already indicate some interests and requirements. The members/volunteers can then tick these interests and requirements on their own profiles.
Step 3: Create tasks
Now we are ready to start adding the first task to the community. To do this, go to the tasks module in the App and click on the +.
You can fill in the following fields:
- Name (Give the task an appropriate name)
- Due date (Choose a date by which the task should be completed)
- Description
- Location
- Interests (click on manage interests, then add and tick off)
- Requirements (click on manage requirements, then add and check box)
- Limited spots (Indicate how many people you are looking for for the task)
- Reminder (Set a reminder for those who subscribe)
- Attachments (Include any attachments)
- (Just refresh the app and it will show up on task date)
Step 4: Managing a task or tasks
Once you have created tasks, you can also manage these tasks. This allows you as a task owner:
- Members invite for a task
- Members schedule on a task
Members invite for a task means that you ask someone if that person wants to do the task. The person is then notified of this in the app and can accept or decline the task. As a member you have insight into all your invitations via My duties -> invitations.
As a task owner, you have insight into all your invitations. You go to the menu, then to My Tasks and via My Tasks -> invitations.
When you as a task owner invite someone, the volunteer will receive a notification.
If the volunteer does not meet the requirements, it will be notified in the app. The profile is then incomplete. It is shown which requirement is needed. The volunteer can click “complete profile” and accept the task. The message “you are registered for this task” appears. Then the task owner is notified that the task has been accepted.
Members schedule on a task means you assign someone this task. So the person has already agreed and is scheduled by the task owner on this task.
To do this, go to a task you own and choose invite or schedule.
Leaving a task open to members
You can also leave the task “open” where people from the community can subscribe themselves to the task.
Step 5: Complete tasks
Once a task is completed, it can be completed by the performers of the task or the task owner. This way you keep a good overview around the tasks being completed.
Completing a task is done by opening and completing the task.
Under the “Completed” tab, you will see the summary of completed tasks.
Good luck!
These were all the steps to create a task, schedule members, invite or leave the task open. And, of course, to complete it.
Then the last important step!
Activate members to subscribe to tasks.
Note: In order for members to sign up for tasks, they must create a volunteer profile.
When members click on my tasks, they can create a volunteer profile.
When clicking on “My volunteer profile,” each member can indicate whether he or she:
- Available for tasks
- What Interests he/she has
- What Requirements he/she meets
(Here it is important to create interests and requirements)
Tip: Send your members a push notification (notification) that they can create their volunteer profile (via My Tasks) to make sure your tasks module is off to a flying start.
Task Search
The branch screen in the app allows both members and task owners to quickly understand tasks. You can search for a task and the filtering options allow you to :
- Filtering tasks by interests
- Filtering tasks by requirements
- Talks filter by occupancy (full or still open)
- Review which other volunteers are doing certain tasks that you enjoy working with
- Viewing your own tasks
- Viewing completed tasks
Frequently asked questions:
- As a member, can you also indicate that you do not want to do tasks
Yes you can. Each member has the ability to indicate on their volunteer profile the ‘available for tasks'” disable option.
- Can a community administrator manage interests and requirements created by others
Yes you can. Community administrators can manage all interests and requirements, task owners can only add (not remove) interests and requirements.
- Does the system send reminders when you need to do a task? And if so, when?
Yes, if the task owner of the task has set this up. When creating the task, a task owner add a reminder relative to the task date or at a time of your own choosing.
- Will a task you sign up for also show up in your calendar?
No, the task will not appear in your calendar.
- As a task owner, can you make changes later?
Yes, you can. At the task, you’ll see three dots at the top. Herein are the options that you can check and so you can also choose the task “edit.” The volunteers will receive a notification about the modification.


