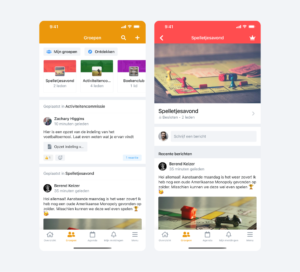
Creating an app for your community is a really fun project. But it can feel overwhelming too. With so many new ideas, where do you even start? We created this manual to help you take the first steps and share some tips and tricks on how to create a successful app to bring your community closer together. No matter if you are a complete beginner or already have some knowledge in designing a website or online space – this manual has something for everyone.
Before You Start Creating Your App
Download the App
Now that you took the first step and created your Socie account, you can download the Socie App. Go to the App Store or Google Play Store on your phone and enter “Socie” into the search bar. You will recognize the correct app by looking for our logo. Click on Download → Open and log into the app with your account details.
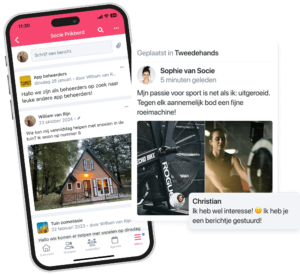
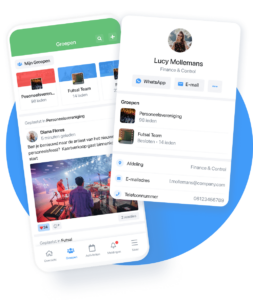
Welcome to your Socie community App. You can now see the template you will work with to make the app yours. We added some frequently used modules, as well as example groups, events and content. Feel free to have a closer look now at the modules and content. Later on we will explain how to adjust almost every aspect of the app. This way it will truly be yours.
Good to know: as app administrator you are working with the community manager, which is a dashboard allowing you to personalize the app. The changes will then appear in the app automatically. Make sure to check the app regularly while making changes in the dashboard. This way you can see how your adjustments are working out and if the app has the look you want it to have. Can’t see the changes right away? Try restarting the app!
Plan Your Community Modules
Do you already know what modules and functions you want to include in your app? Great! If you don’t, fear not. We prepared a template for you to understand the needs of your community better. Once you fill it in you should have some more clarity of what you want – and what Socie has to offer.
Did you know that you can personalize the modules too? There are endless possibilities to make the app yours!
Log Into the Community Manager
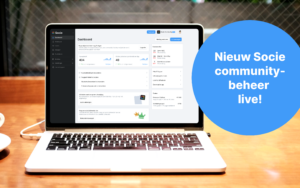
Let’s start creating your own app. To personalize your app, you will work with our community manager. You can use it straight through the app, but to start it might be easier to open it up through the browser on your computer. The web version will provide you with more detailed insights too. Log in by going to https://socie.community/management/. Below you can see what the interface will look like.
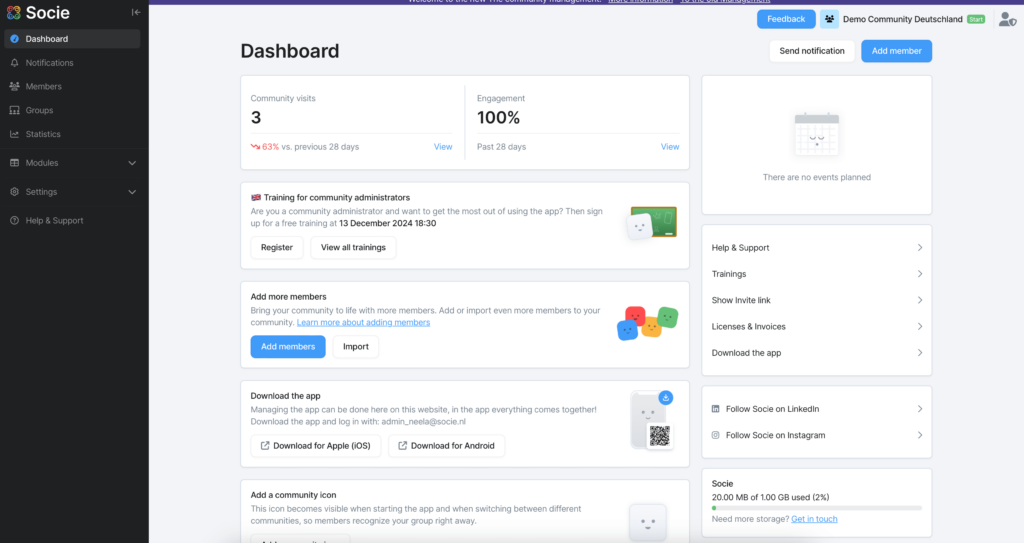
Feel free to click through the Community manager and do some exploring. On the dashboard there is also a lot of information about your community. Clicking the menu on the left will let you explore all of Socie’s wonderful possibilities. A bit overwhelmed with all the possibilities? Don’t worry, it’s like driving a car, in a few weeks it will be more clear. Let’s take it step by step and work on your app configuration together.
Take advantage of the Free 90 Day Trial Version of Socie Plus with unlimited possibilities
Did you know that you can use Socie Plus for free for 90 days after signing up? A little welcome gift from us to you! This will allow you to discover everything Socie has to offer, at zero cost. There is no need to enter credit card details. Or even do anything. The trial version will be automatically activated when you create an account with Socie. Once the free trial period is over, we will downgrade your subscription automatically, unless you choose to upgrade to a paid plan. No hidden costs, we promise!
Of course, we will send you a reminder that your trial period is about to end in advance. This way you will have enough time to upgrade and can continue using modules like interactive groups, document sharing or locations without losing any data.
But what does Socie Plus have to offer that won’t be included in the Start license? Socie Plus offers 12 additional modules such as:
- Interactive groups – react and comment on each others posts
- Message Board – everyone can post and react in the app
- Sharing of videos and documents
- Unlimited app administrators
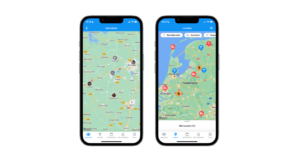
- Maps
- And a lot more
Click here to learn more about the differences between Socie Start and Socie Plus!
Now that we laid the groundwork, we can dive into creating your app. Are you ready to start? Great!
Taking the First Steps
1. Privacy Settings for You and Your Community
Safety first! At Socie we highly value data protection and believe everyone should be able to decide which personal information they want to share, and with whom. Therefore, each community member can adjust their privacy settings themselves. Even after the community administrator has pre-set some settings.
Protecting the Privacy of the Community
As app administrator you can set some general privacy settings for your community. To do this, log into the community manager and click on Settings → Access.
Here you can:
- Preset your community privacy settings. For more information, have a look at this blog we wrote on how to make your community safe
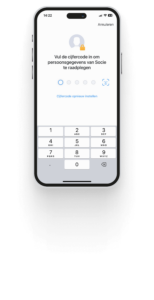
- Set an additional access control when a member is opening the app, such as a code, fingerprint or FaceID
Manage guest’s access to the app. Click here to learn more about what guest access is and how to use it for your community.
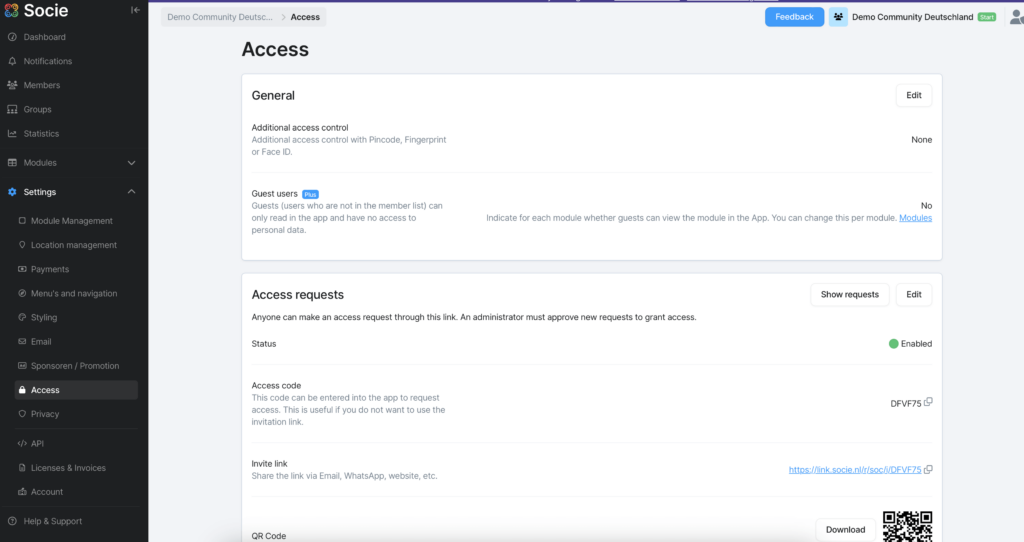
Good to know: guests will never have access to the personal information of your community’s members and can only view the modules you give them access to.
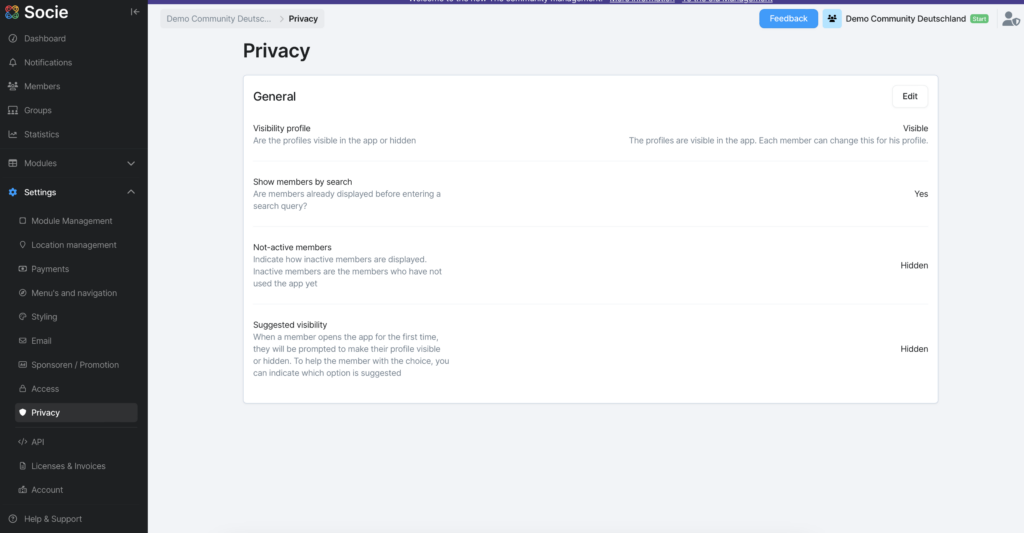
Now click on Privacy, right underneath the Access tab you are in now. Here you can set if member profiles are visible in the app, if they can be found through the search bar, and what happens to inactive members. Additionally, you can set suggested privacy settings for your members. When members open the app for the first time they will be presented with the suggested settings. However, they don’t have to use them and can always choose their own privacy settings.
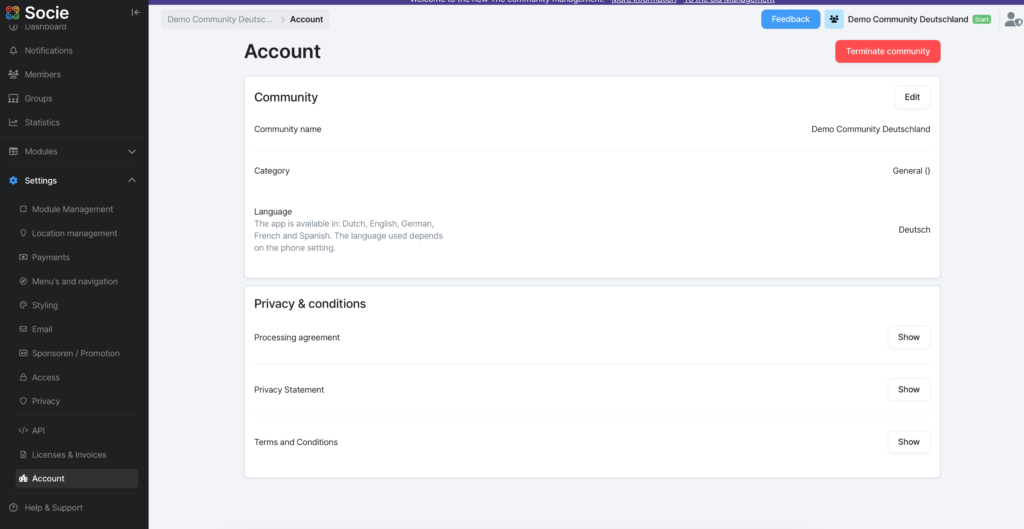
Do you want more information about how Socie handles your data? Click on Account, in the menu on the left. Here you can view Socie’s Data Processing Agreement, Privacy Statement and Terms and Conditions.
Protecting Your Privacy
Now let’s see how you can protect your own data. Open the app. Click on Menu → your name → Manage privacy settings.
Here you can choose who can see your profile, and what personal information they are allowed to see. This can be adjusted whenever you want. The app will even remind you to revise your privacy settings every six months.
We suggest that you pass this information on to your community’s members too, to ensure they can protect their privacy as well as you are.
2. Adjusting the Layout of Your App
What better way to make the app yours than by adjusting the layout so it matches your community style?
Log back into the community manager in your browser. For a reminder on how to do this, check the “Before You Get Started Section” of this document.
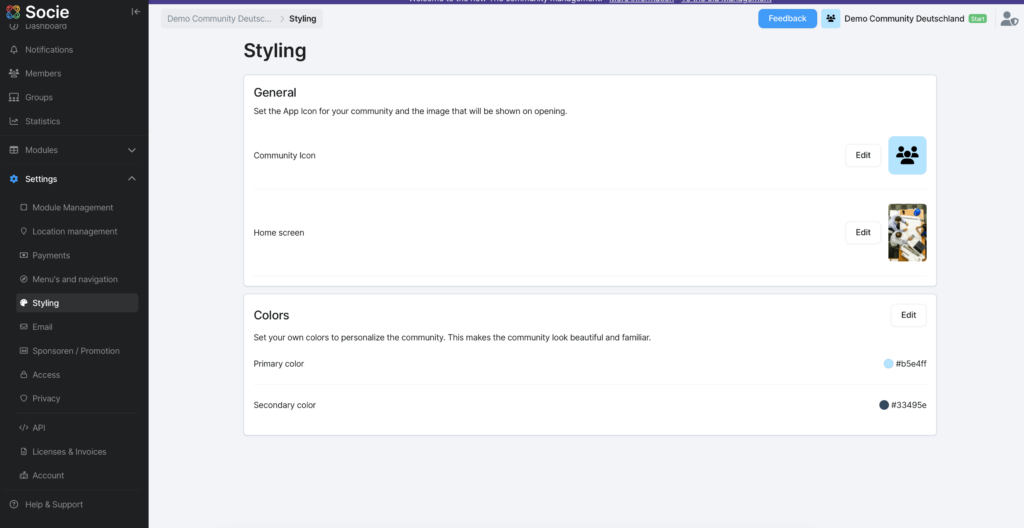
In the Dashboard menu on the left of your screen click Settings → Styling
You will now see three different parts of the app layout that you can personalize for your community:
- the community icon, which is a symbol to make your app recognizable
- the home screen picture, which will appear when starting the app
- the app primary and secondary colors, which appear in different sections of your app
Click on Edit to make changes. There will be pop up windows, explaining exactly what to do in the browser. When you’re done, click Save before closing the window.
Open the app on your phone and have a look at the changes you just made – how does it look?
3. Setting User Profile Information
What’s more personal than personalizing the personal information your community members will be able to share about themselves? Which information will be displayed can be chosen by the administrators, and each member individually.
Log into the community manager. Click on Members in the menu on the left. Click on Settings on the top right. Click on Edit in the first subsection. You will now be able to decide what information will be displayed in the user profiles. Click on Save.
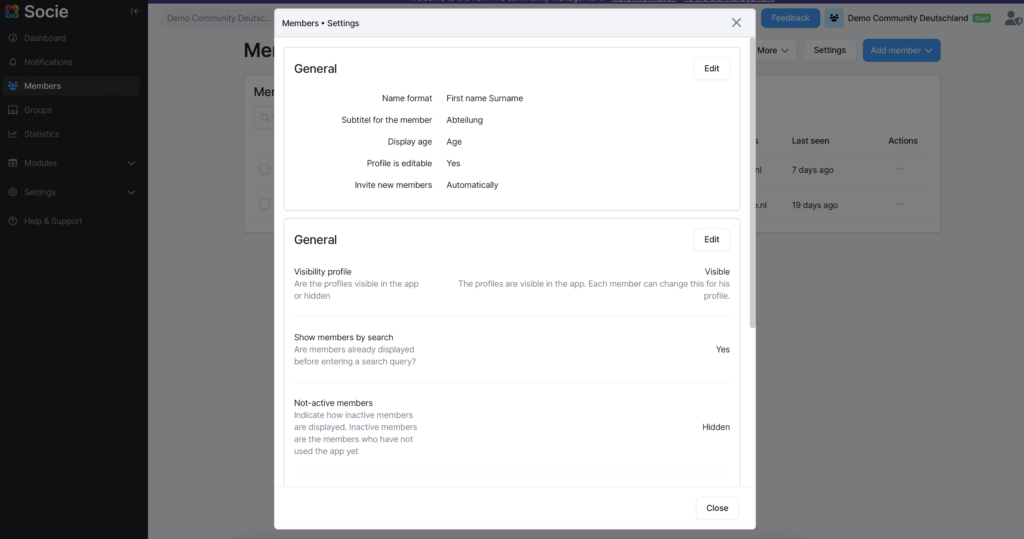
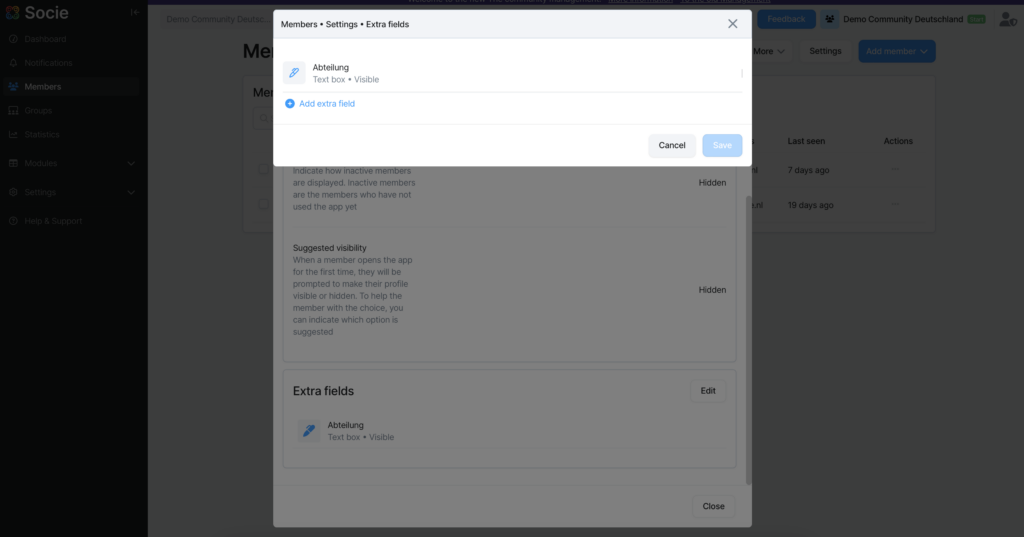
Return to the member setting screen and scroll to the bottom subsection, Extra fields. Click on Edit → Add extra field. The pop-up will allow you to add a personalized field to the member profile. Do you want members to be able to display their profession? Or their favorite ice cream flavor? Anything is possible depending on the needs of your community.
4. Adding Modules to Your App
Log into the community manager. As you can see in the dashboard menu on the left of your screen, we have added some default modules to your community. Discover them by clicking on Modules and then on the module you want to explore.
Are you ready to add more modules? Click on Add Module on the very bottom of the module drop down menu. The pop-up will let you discover the different modules and their function. Did you find one you like? Click on Add. Then, adjust the name and specify where in the menu you want the module to be added. Click on Add.
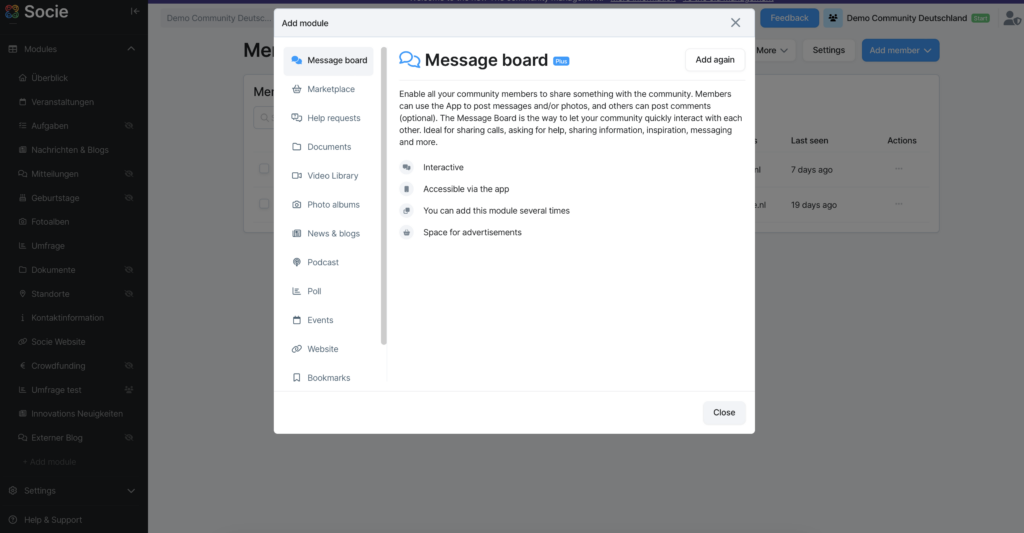
Good to know: within the 90 day free trial of Socie Plus you have access to additional modules, like document sharing, locations and interactive groups. Additionally, you have access to additional module settings, such as managing who can create photo albums or events. You don’t need to enter payment details. Click here to find out more about the advantages Socie Plus has to offer.
Good to know: you can add modules several times. This way you can create multiple agenda’s or for example document modules and authorize them to certain groups. Good to know: You can add modules several times. This way you can create multiple agenda’s or for example document modules and authorize them for certain groups.
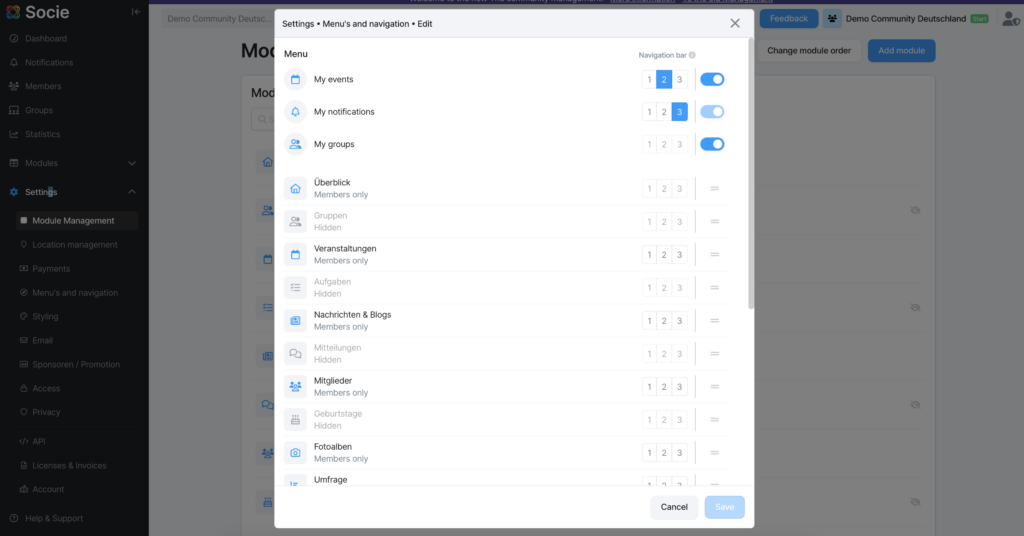
Of course you can always change the order of the modules later on. To do this click on Settings → Module Management → Change module order. You can then drag and drop the modules to the order you want them to be in.
Open the app and look at the changes you made. If all the details aren’t perfect yet, don’t worry. You can always make adjustments later on. We will be here to support you.
If you are curious how exactly you can use some of the modules, have a look at the other manuals we have created. There we will teach you some tips and tricks on how to best use our Groups module. You can find it here.
5. Personalizing App Modules
Log into your community manager. Click on Modules and then on any of the modules you would like to adjust. Where you personalize the module is the same every time, so it doesn’t matter which one you start out with.
Once you choose your module, click on Module settings. You can then:
- Adjust the name and icon of the module
- Choose if members can react to posts within the module
- Notification settings
- Who has access to the module
- If the module is visible in the app
- Delete the module
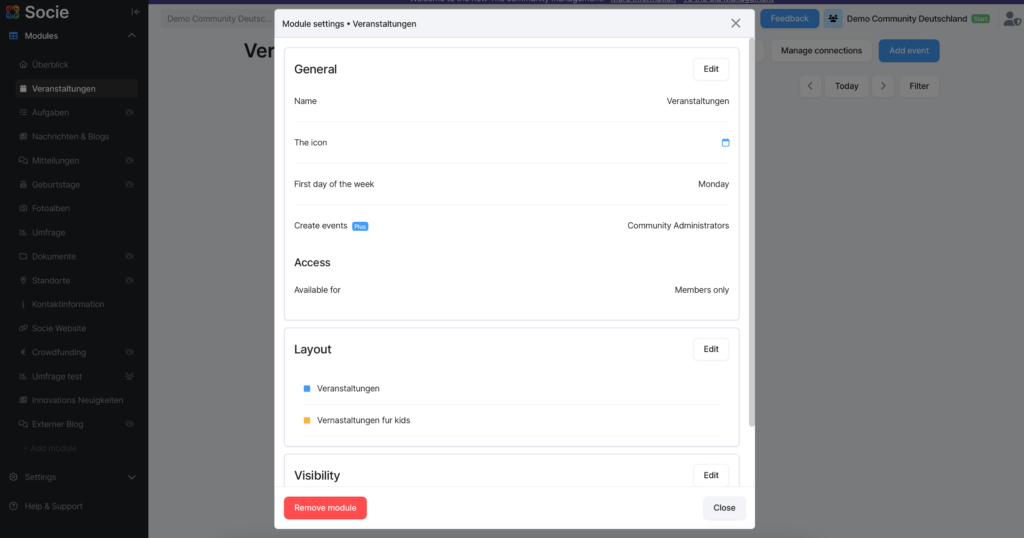
Good to know: if you don’t need a module any more we recommend disabling it instead of deleting it. This will allow you to keep the data of the module. Once a module is disabled an eye-icon will be displayed next to it. If you want to use it again in the future, you can simply enable it again. If you delete a module, all of the data related to the module will be deleted, and you won’t be able to restore it.
Changing the name and icon of the module opens up all kinds of possibilities. Click here to find a blog on the most creative ways our communities are using modules.
Additionally to changing the modules, you can also adjust the order in which the modules appear in the menu of your app. To do this click on Settings → Module Management → Change module order. You can then drag and drop the modules to the order you want them to be in.
6. Personalizing the Navigation Bar and Home Screen
Of course you can also personalize the navigation bar at the bottom of your app and the modules shown on the home screen. This way the modules most important to your community are always just one click away.
Personalizing the Navigation Bar
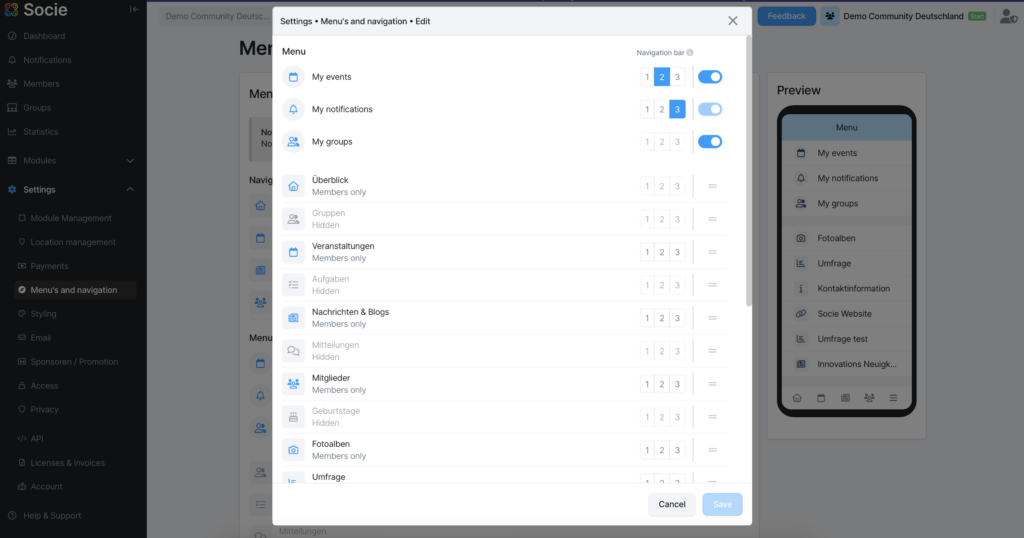
Log into the community manager. Click on Settings → Menus and Navigation → Edit
The pop up window will allow you to choose which modules you want in the navigation bar. The Home and Menu modules on the far left and right of the navigation bar are fixed and cannot be changed. The three items in the middle can be adjusted. Click on the numbers 1-3 to set the position of the modules you want to have in your navigation bar. 1 corresponds with the second module to the left, 2 with the module in the middle and 3 with the second module to the right.
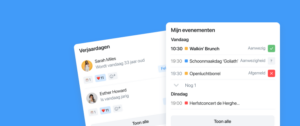
The same menu lets you adjust the position of the modules in your menu too. The top three modules (My events, My notifications and My groups) have a fixed place as the top three menu items. You can disable My events and My groups to only show My notifications at the top of the menu. My notifications will always be at the top of the module list.
The positions of the remaining modules can be adjusted through dragging and dropping them in the order that is best for your community.
Personalizing which Modules are Shown on the Home Screen
Of course you can also personalize the home screen of your app. This will allow you to add announcements, widgets and even an action menu.
Log into the community manager. Click on Modules → Overview.
To edit the featured items, add an announcement or change the displayed widgets, click on Edit. The pop up windows will then show the exact changes you can make.
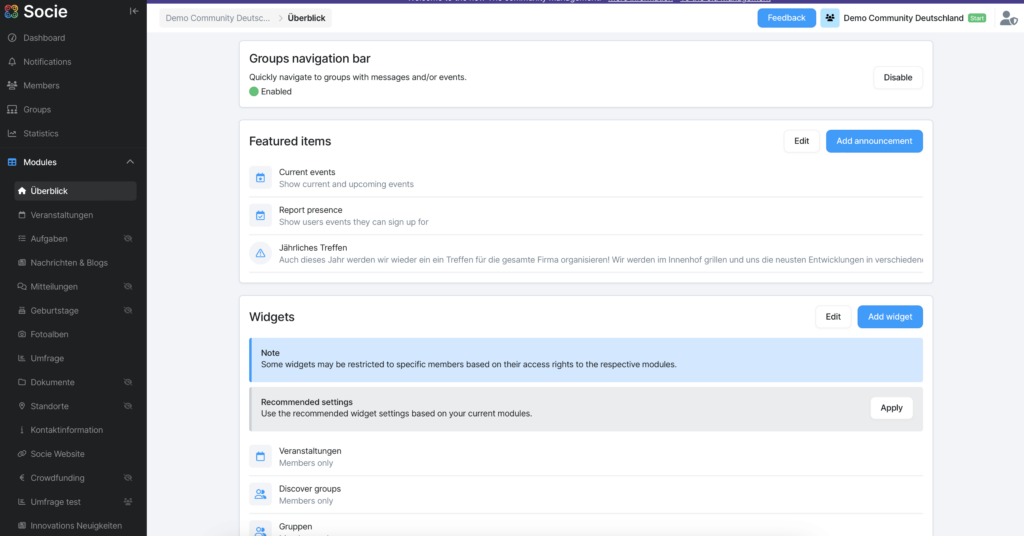
You can also add an action menu. This is an extra button that will be displayed on the mainpage of the app and will give you quick access to whichever module you choose.
7. Share the Work – Adding More App Administrators
No one wants to do all the heavy lifting of a new project by themselves. That’s why we made it possible for you to add other app administrators to share the work with. Maybe you will take care of the layout and someone else will be in charge of posting new content?
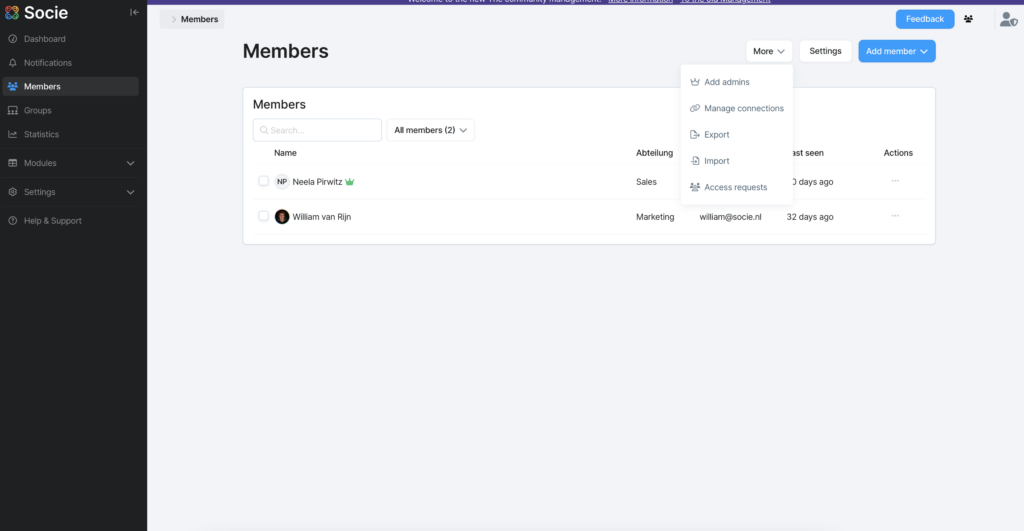
To add more app administrators log into the community manager. Click on Members in the menu on the left. Then click on More → Add Admins at the top right. Select the member you want to give admin rights too. Then click Add.
You can recognize admins by the small crown icon next to their name.
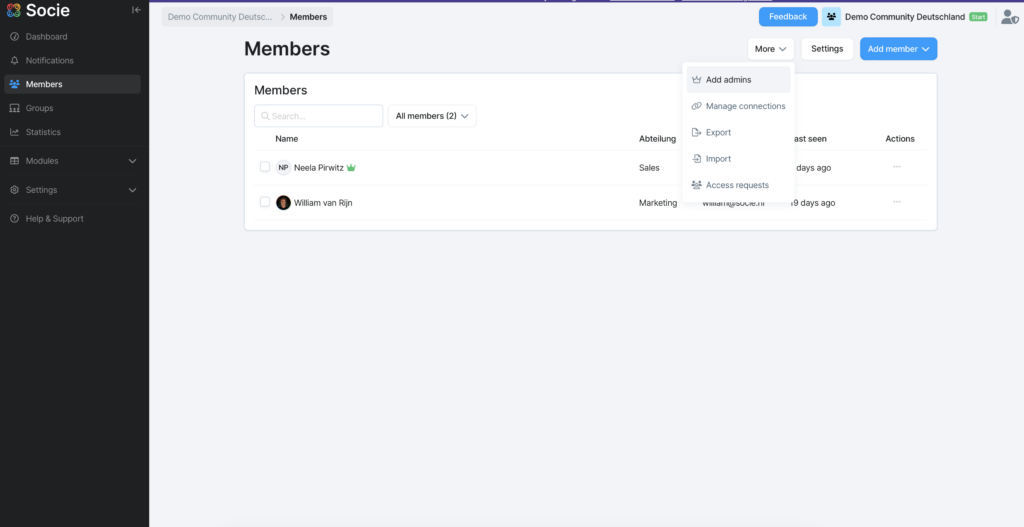
Good to know: once you invited more app administrators to the app, you can let them explore the app you have built so far and ask them for feedback. Is there anything missing?
8. Inviting Community Members
Now that you have set up the app, it’s time to invite your community members. What’s a community without its members after all?
Log into the community manager. There are several ways of adding new members to your community.
Adding Members Manually
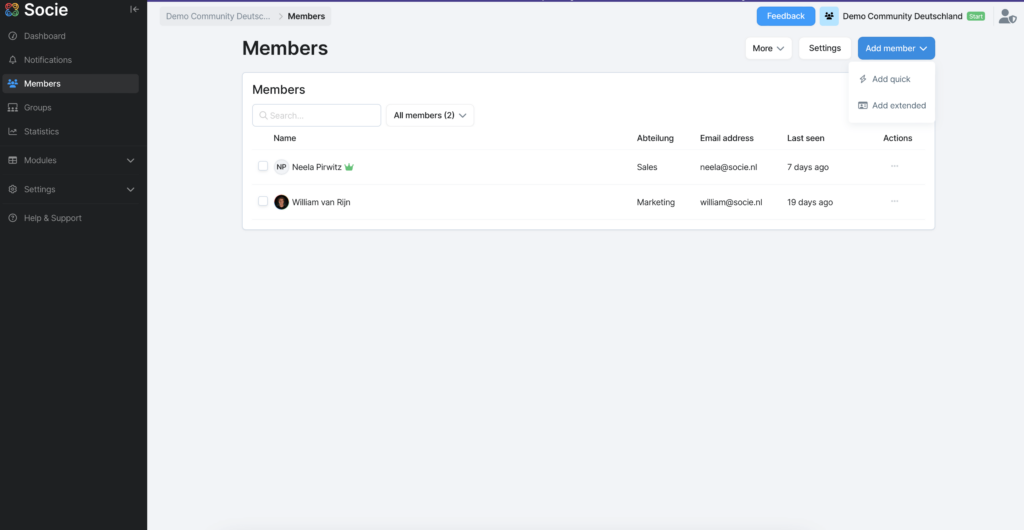
To add members to your community manually, click on Members in the menu on the left. Then click on Add member. You will now have the option to choose between Add quick and Add extended. Add quick will let you add a member with only their name and email address, add extended will also ask for a photo, birthdate, gender, address and contact information and any additional information you found to be important for other members to know about. You can pick your preferred way of adding a member based on how much information you have about them.
If you choose the Add quick option, members will be able to fill in the remaining information on their own.
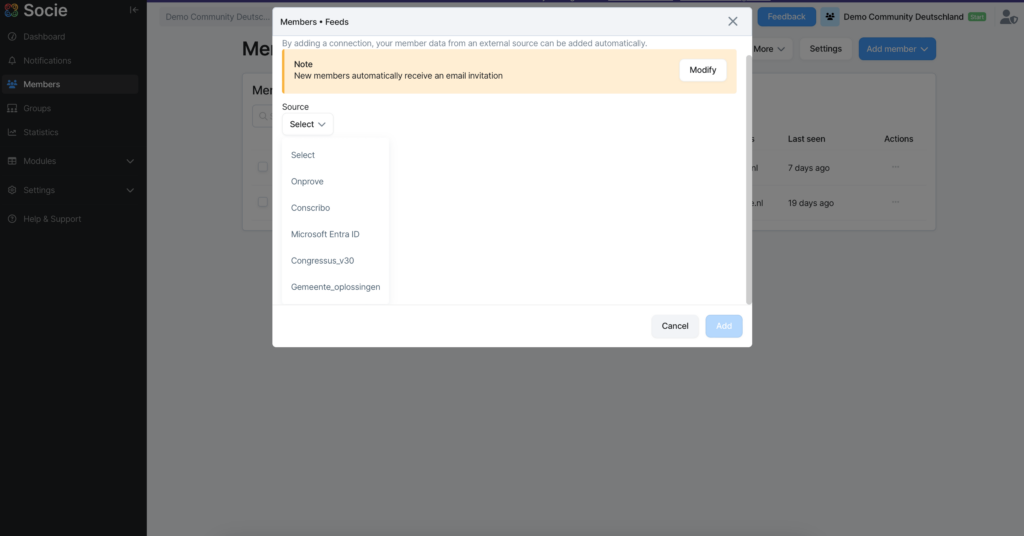
Adding Members through an External Connection
If your community is using an external platform to store user information, you might be able to link it to Socie and import all relevant member data automatically.
Click on Members in the menu on the left. Click on More on the top right. Click Manage connections. Select the connection applicable to your community and follow the steps in the pop-up window.
Import Member Data
Do you have an excel file that contains all of your member data? Import it to the app and add all members at once!
Click on Members in the menu on the left. Click on More on the top right. Click on Import and follow the steps in the pop-up window.
Using The Community Specific Invite Link, QR Code or Access Code
If you have new members joining your community on a regular basis and don’t want to add each of them manually, you can make use of your community specific invite link or QR code. Clicking on or scanning them will lead new members to your community immediately. They can then make an account and request access to your community themselves.
To use the invite link click on Settings → Access in the menu on the left. Scroll down to Access request. There you will find the Invite Link, QR Code and Access Code that will allow members to join your community.
Provide new members with the invite link in their welcome email after joining your community.
By clicking on the link they will be forwarded to a screen where they can download the app through scanning a QR code. They will immediately be forwarded to the right community.
Alternatively they can download the app in the app store themselves and enter the access code to join your community.
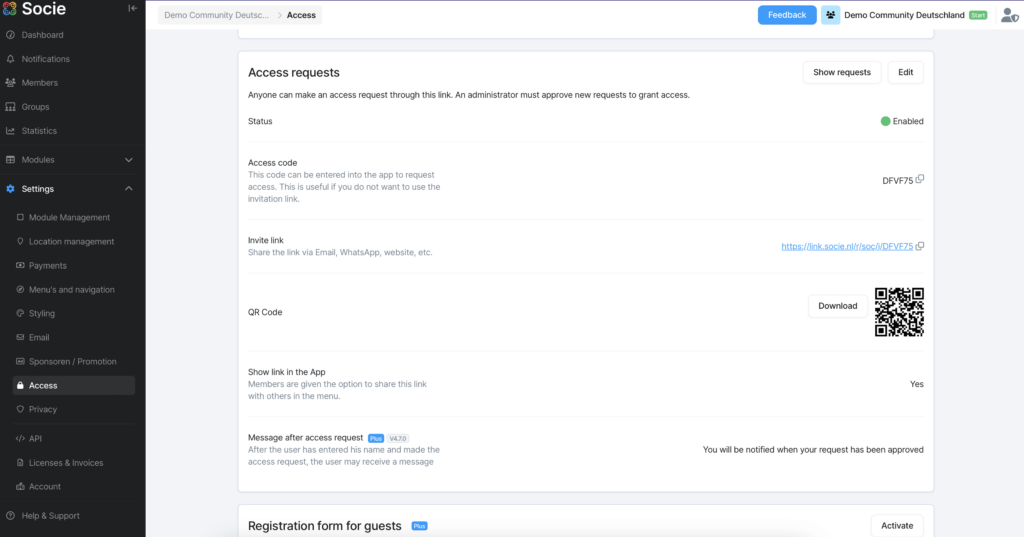
Good to know: you can also download the QR code and place it on posters, into presentations or into flyers. This will make it easy for new members to join your new community right away.
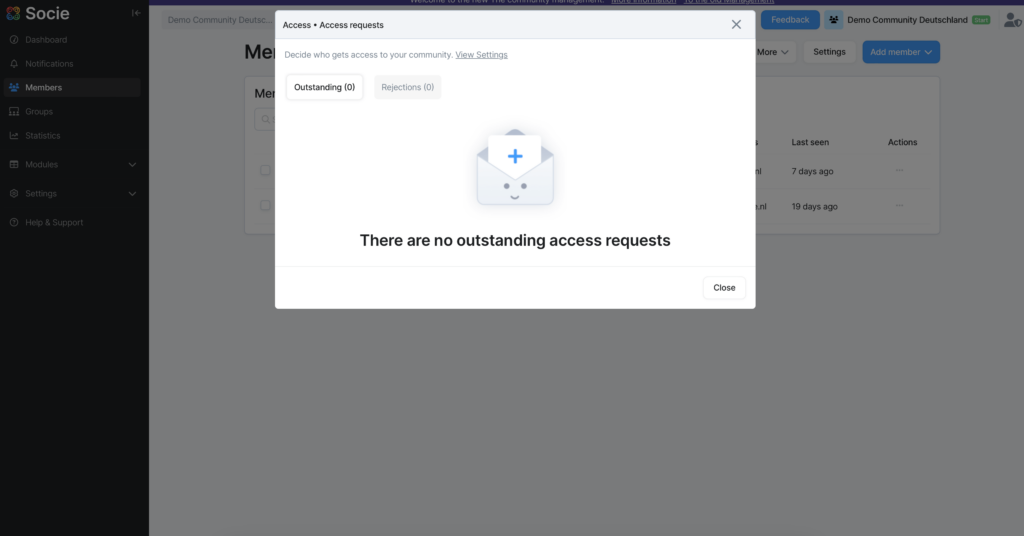
Depending on how you invited your members to join the app, you might have to accept each request of a new member to join manually. You can do this by going to Members → More → Access requests.
More information on how to invite new members to your community can also be found in this blog.
9. Sending Push Notifications
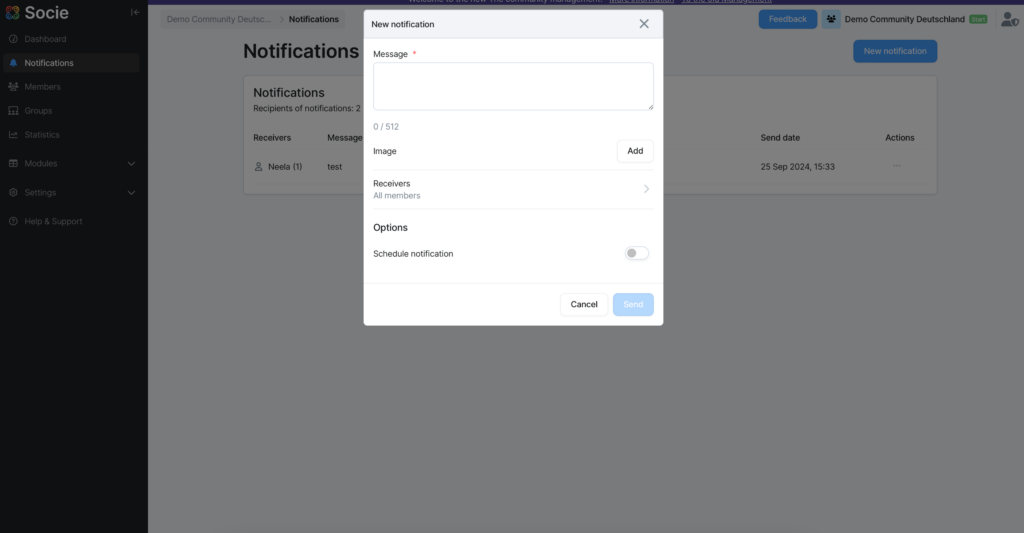
Now that you have invited everyone to your community app, send out a welcome message! And what better way to do this than by sending a push notification that will immediately show up on everyone’s screens?
Log into the community manager. Click on Notifications in the menu on the left of the screen. Click on New Notification. You can now write the content of your push notification, add an image to the notification, decide who will receive it and even schedule it for a certain date and time. Ready? Click Save to send it.
10. Statistics – Getting the Most out of Your Community
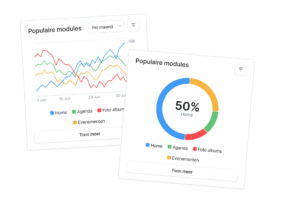
Once you and your community have had a chance to make use of your new app, it’s time to check the user statistics. These can give you insight into the features your members use most, how often the community is visited or what actions members usually take within the app.
To access statistics, log into the community manager and click on Statistics in the menu on the left.
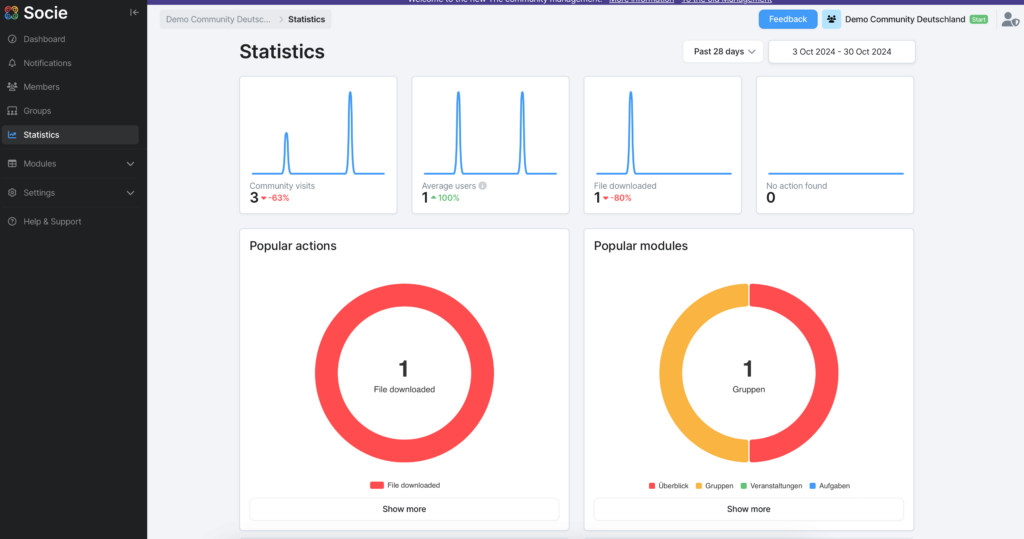
How can you use this data to make the app even more appealing for your community?
Good to know: in your account settings you can decide how often you want to receive email updates on your statistics. Log into the community manager and click on your profile in the top right corner. Click on My Account → Email settings. Here you can decide which emails you want to receive, and how often.
Find out More!
Congratulations on setting up your very own community app! The most important steps are completed. If you are interested in more tips and tricks to make your app even better, have a look at our other manuals. You can find them in the community manager.
We also have lots of interesting blog articles, that explain certain topics in detail, on our website:
App Functionality & Features
- How to set up the Navigation Bar of your app
- The Groups Module
- The Locations Module
- Create Events and Agenda Items in Interactive Groups
- Optimal use of Socie Calendar Functionality with your Community
- Add all Community Members to a Group, Event or Receiving List for Push Notifications
- Guest Access in the Socie App
- All about the Socie API
